পণ্য


.svg)

.svg)

আমাদের প্ল্যাটফর্ম ব্যবহার করে আপনার নিজের ডোমেনে আপনার স্টোর সেট আপ শুরু করতে, আমাদের ওয়েবসাইটটি দেখুন, www.gearlaunch.com/platform এবং "আজ আমাদের সাথে যোগ দিন" এ ক্লিক করুন।

"লগইন" বোতামে ক্লিক করুন। লগ ইন করতে আপনার জিমেইল ঠিকানা এবং পাসওয়ার্ড ব্যবহার করুন।

গিয়ার লঞ্চ বিক্রেতা নিবন্ধকরণ ফর্মটি পূরণ করুন এবং তারপরে "জমা দিন" ক্লিক করুন।

গিয়ারলঞ্চ বিক্রেতার চুক্তিটি স্বীকার করুন।
পৃষ্ঠার নীচে স্ক্রোল করুন; আপনার ডোমেন রেজিস্ট্রার এবং আপনার ডোমেন যুক্ত করুন তারপরে "জমা দিন" বোতামটি ক্লিক করুন।

আপনার দোকানের অনুমোদন পেতে সাধারণত 24 ঘন্টারও কম সময় লাগে। এটি অনুমোদিত হলে আপনাকে ইমেলের মাধ্যমে অবহিত করা হবে।

আপনার স্টোর অনুমোদিত হওয়ার পরে, আপনি আপনার গিয়ারলঞ্চ অ্যাকাউন্টে লগ ইন করতে পারেন। আপনার ড্যাশবোর্ডে, সবুজ বারে ক্লিক করুন যা বলে, "এই গিয়ারলঞ্চ সাইটটি এখনও চালু হয়নি! আপনার ডিএনএস সেটিংস পৃষ্ঠাটি দেখতে এখানে ক্লিক করুন।

এরপরে, "ডিএনএস রেকর্ডগুলি পরীক্ষা করুন" বোতামে ক্লিক করুন।

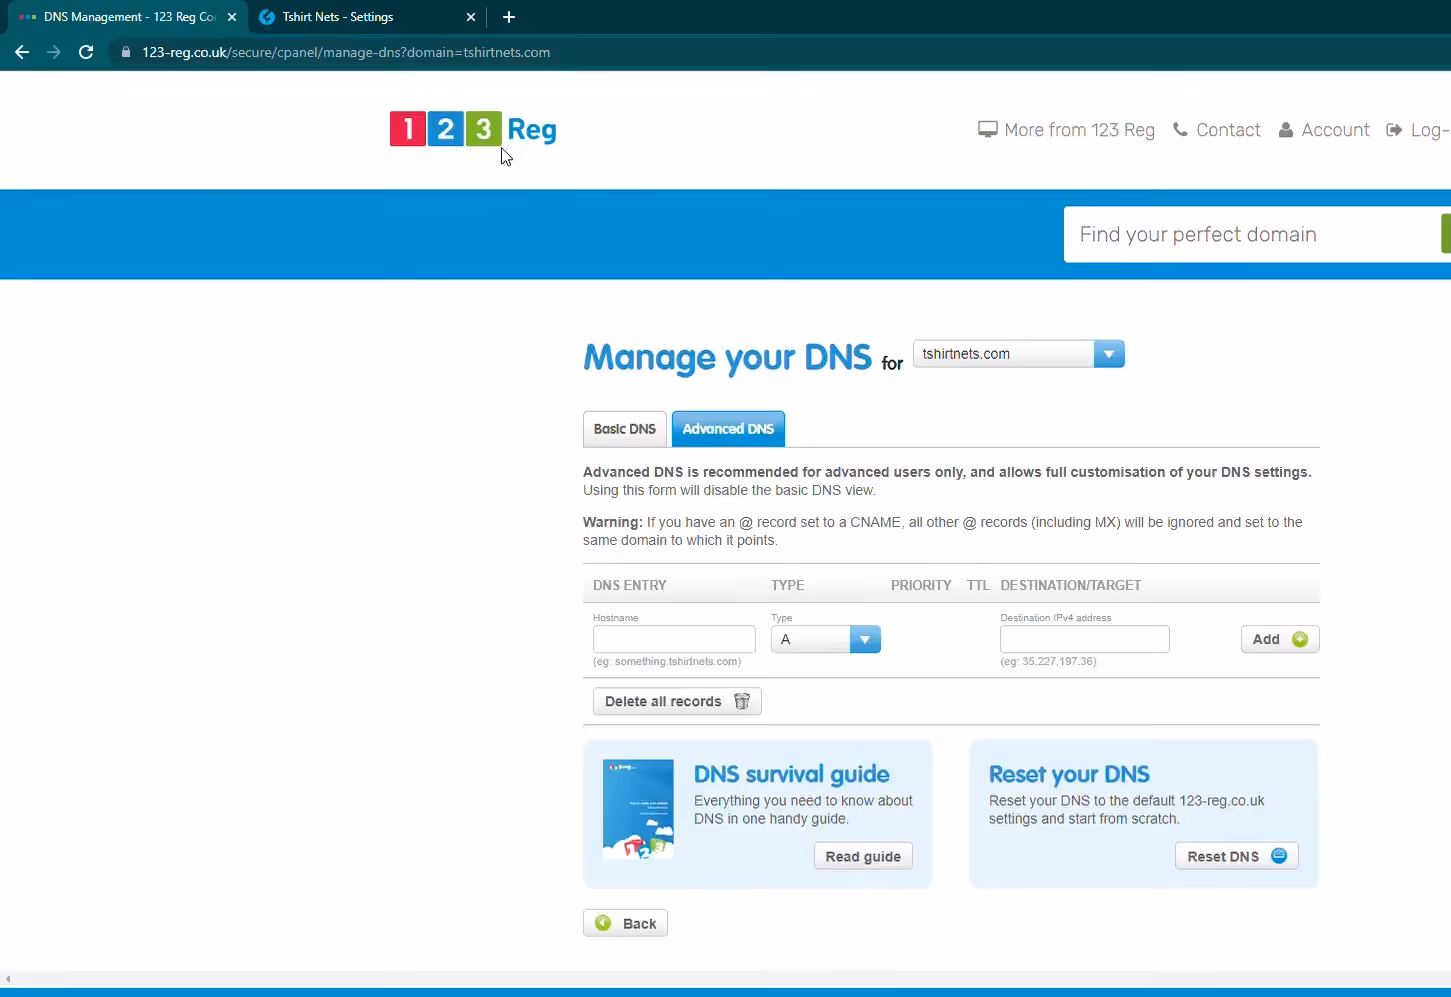
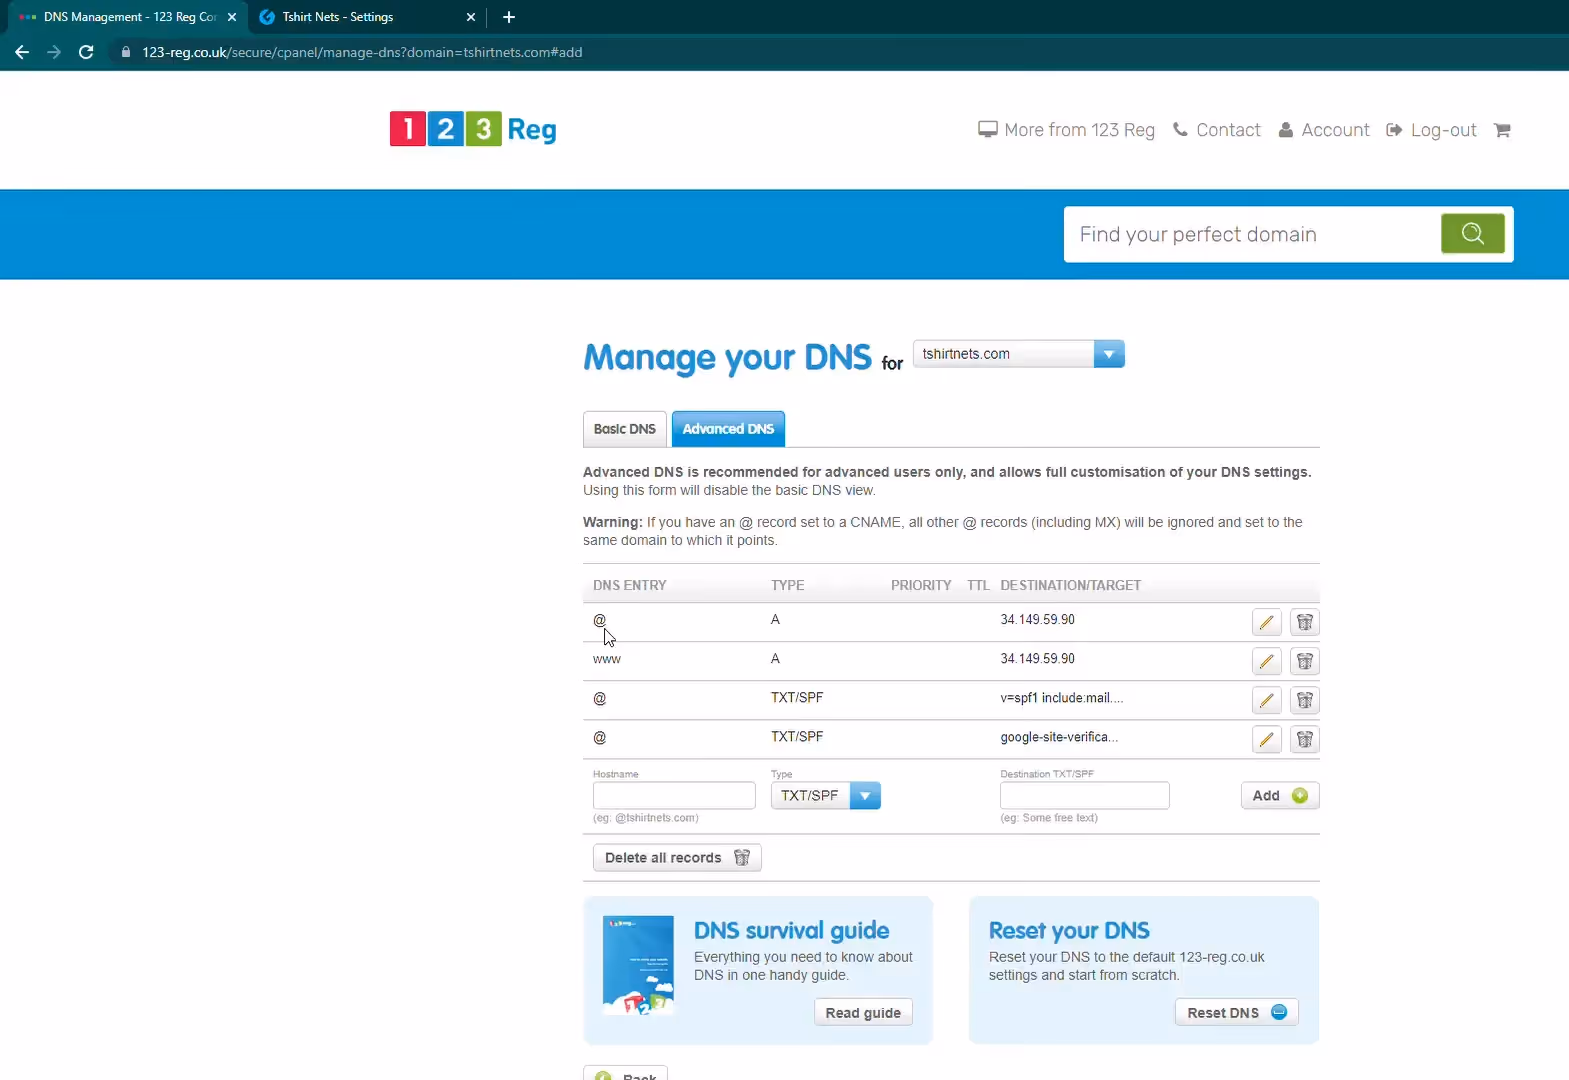
এই ডিএনএস রেকর্ড এবং মানগুলির সাথে আপনার ডোমেন রেজিস্ট্রার আপডেট করতে এখান থেকে মানগুলি অনুলিপি করুন।

আপনার ডোমেন রেজিস্ট্রার ওয়েবসাইটে যান এবং আপনার অ্যাকাউন্টে লগ ইন করুন।
আপনার GearLaunch ড্যাশবোর্ড থেকে পাওয়া তথ্য দিয়ে আপনার DNS রেকর্ডগুলি আপডেট করুন।
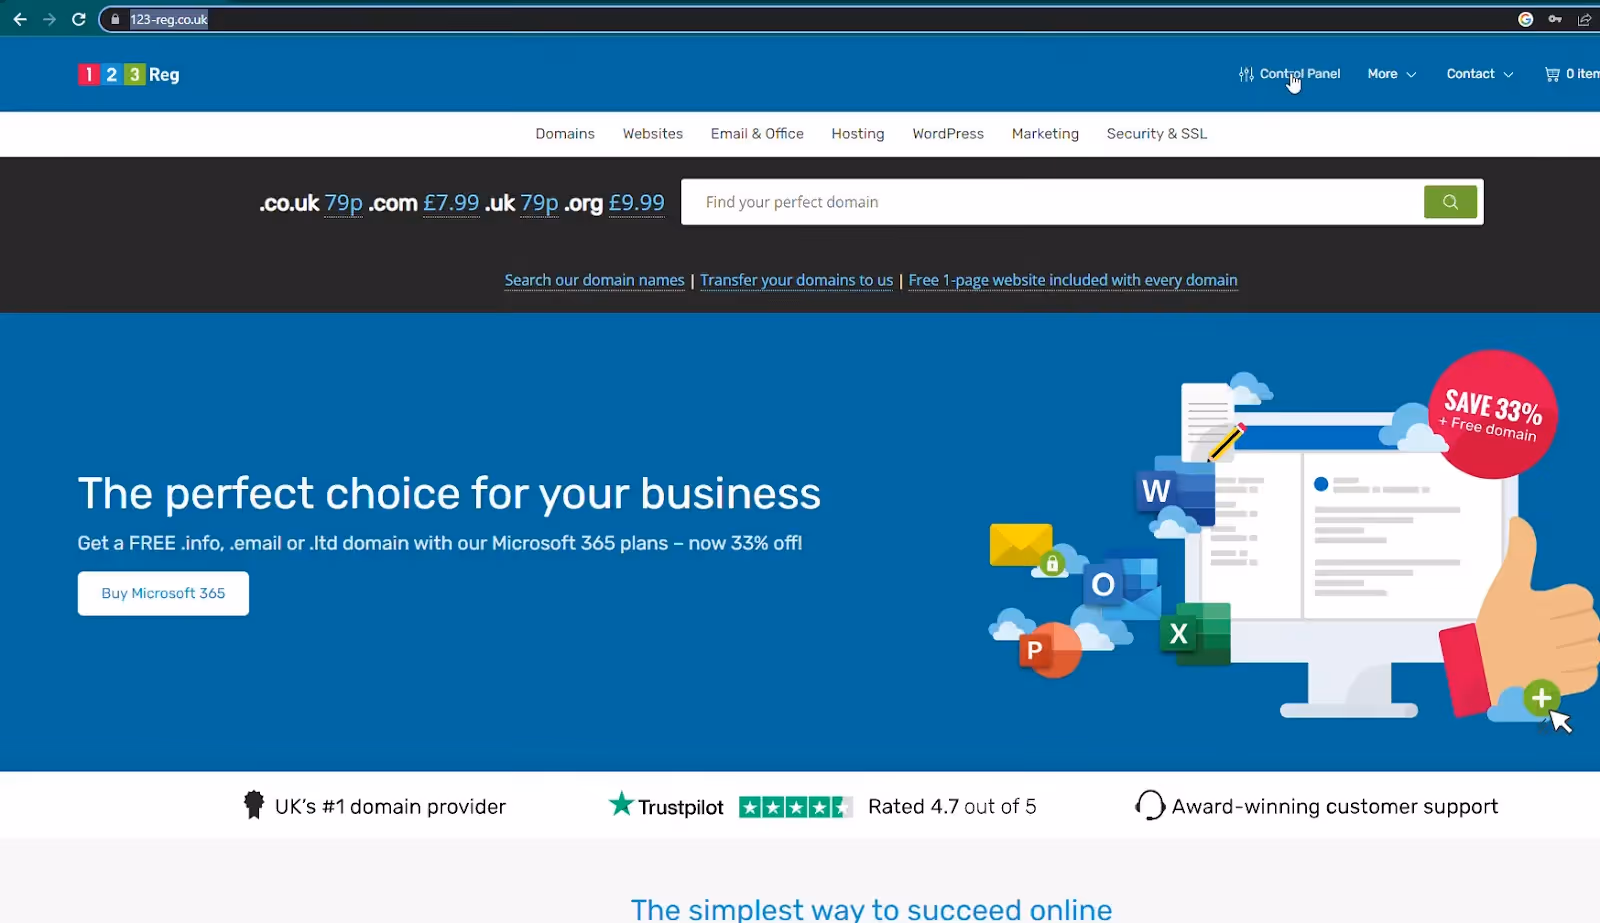
Once you’re set up with your GearLaunch account, log into your registrar account. Click on “Control panel” at the top of the site or click on.
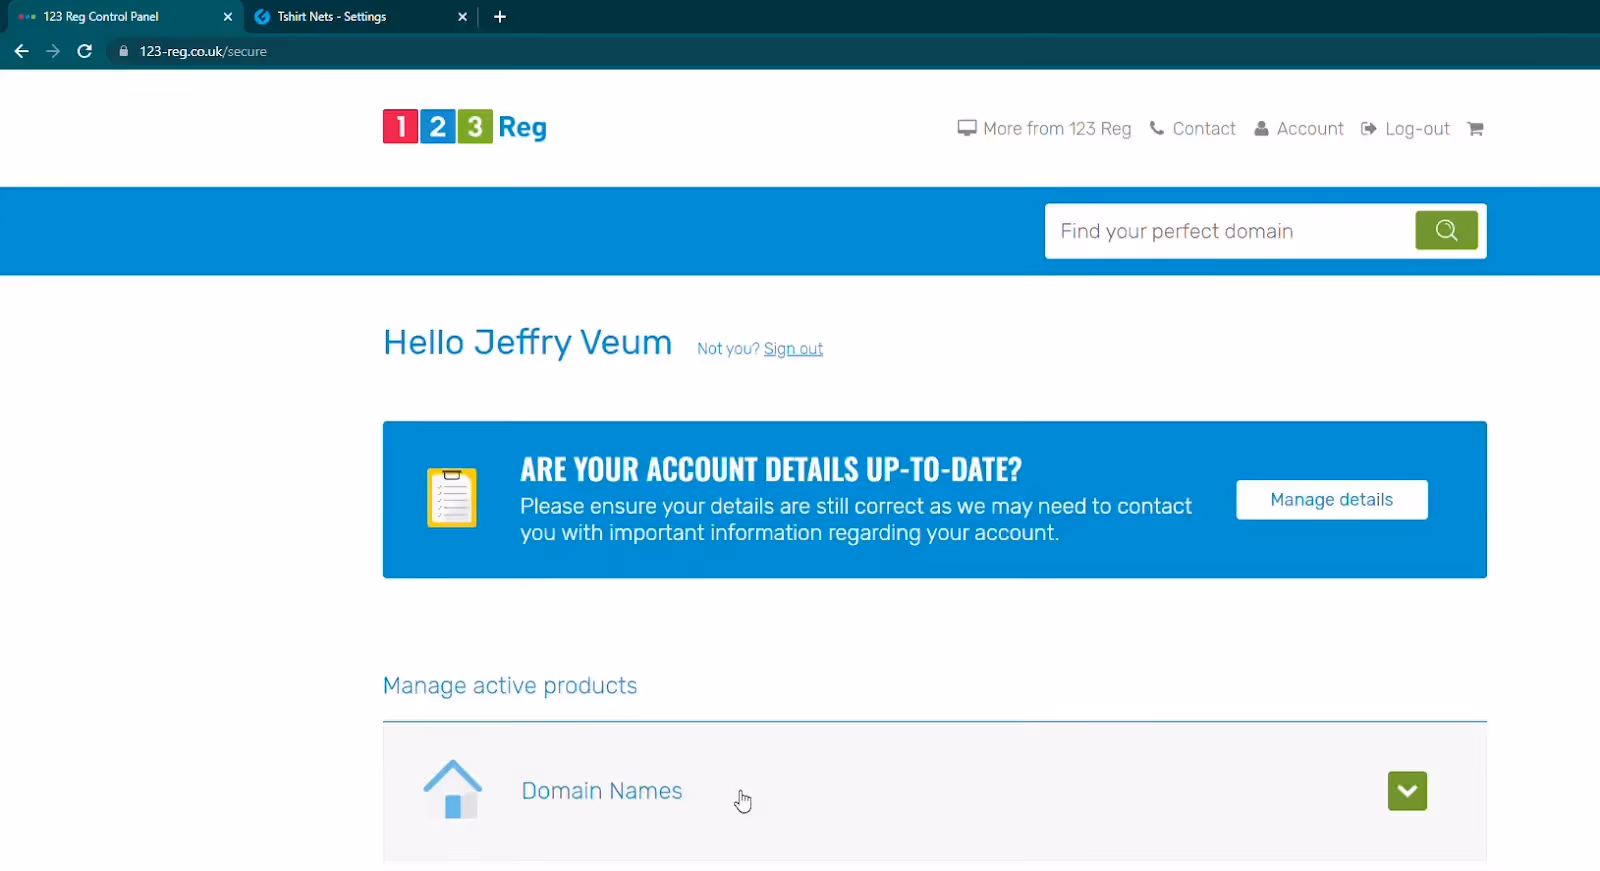
The next step is clicking on the “Domain Names” option in the center of the website.
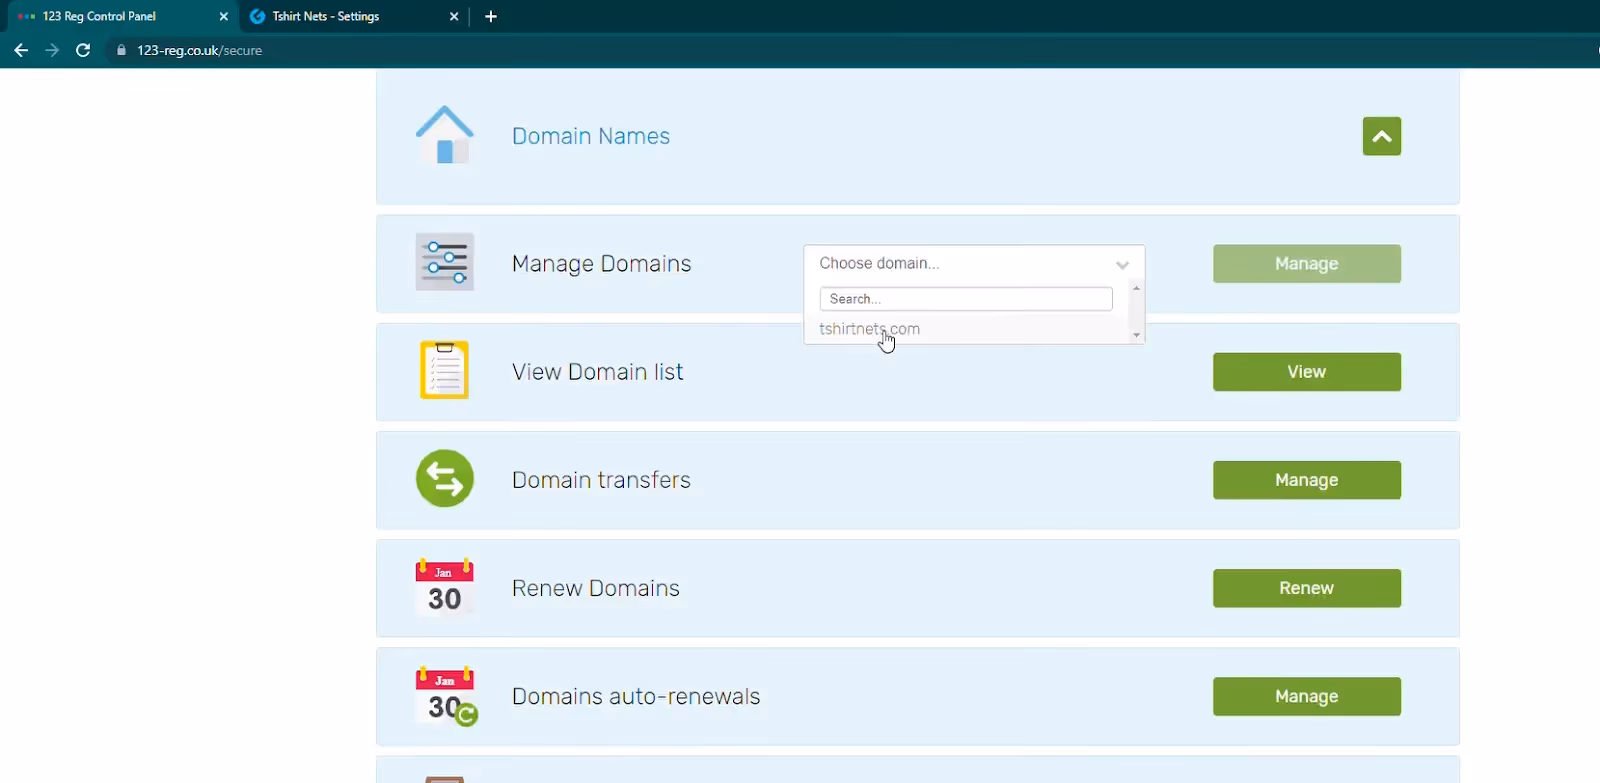
In the next part You need to search your domain name into the Domain list using the search bar if necessary and later click on the "Manage" button.
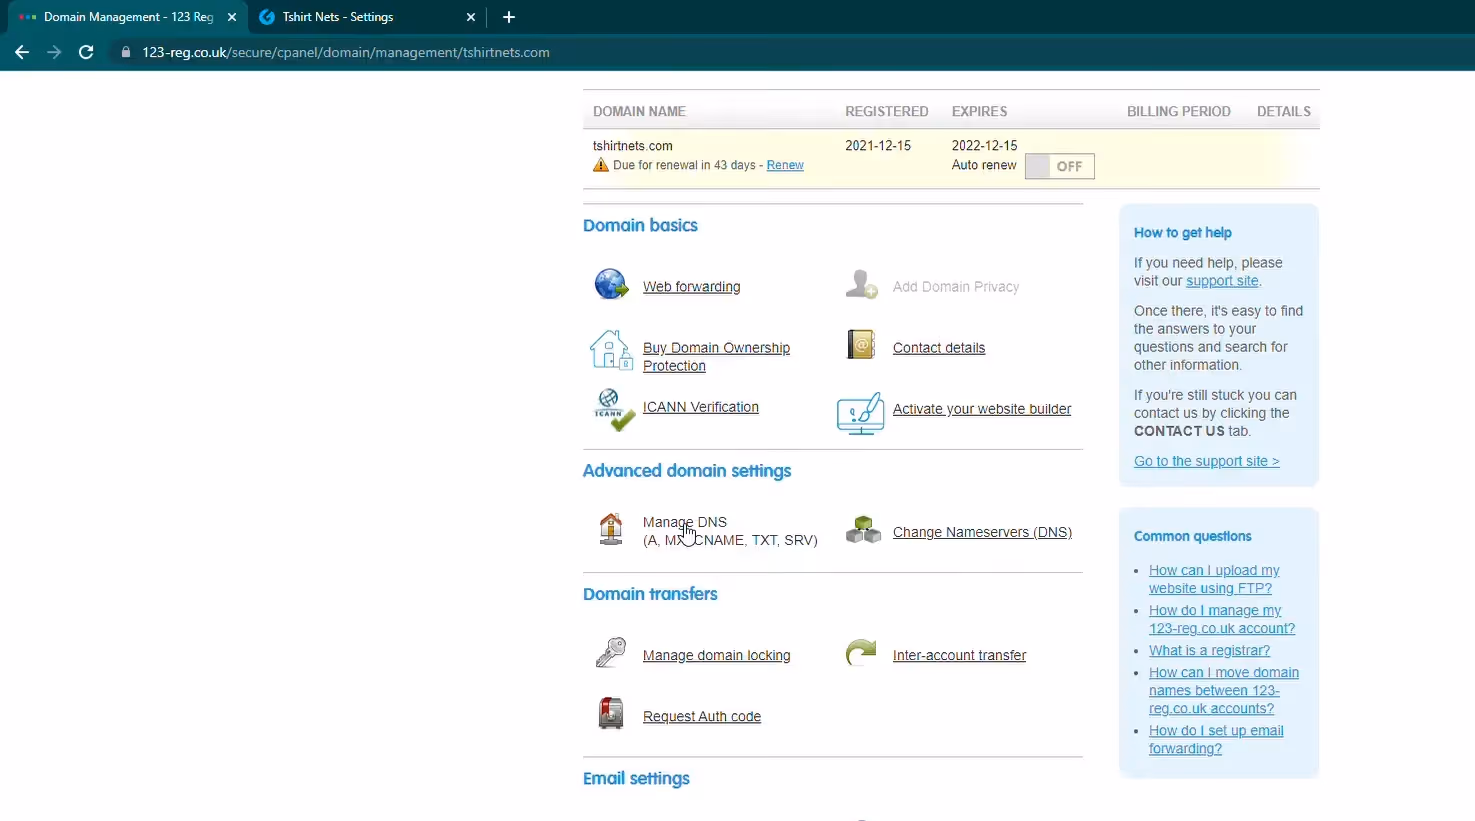
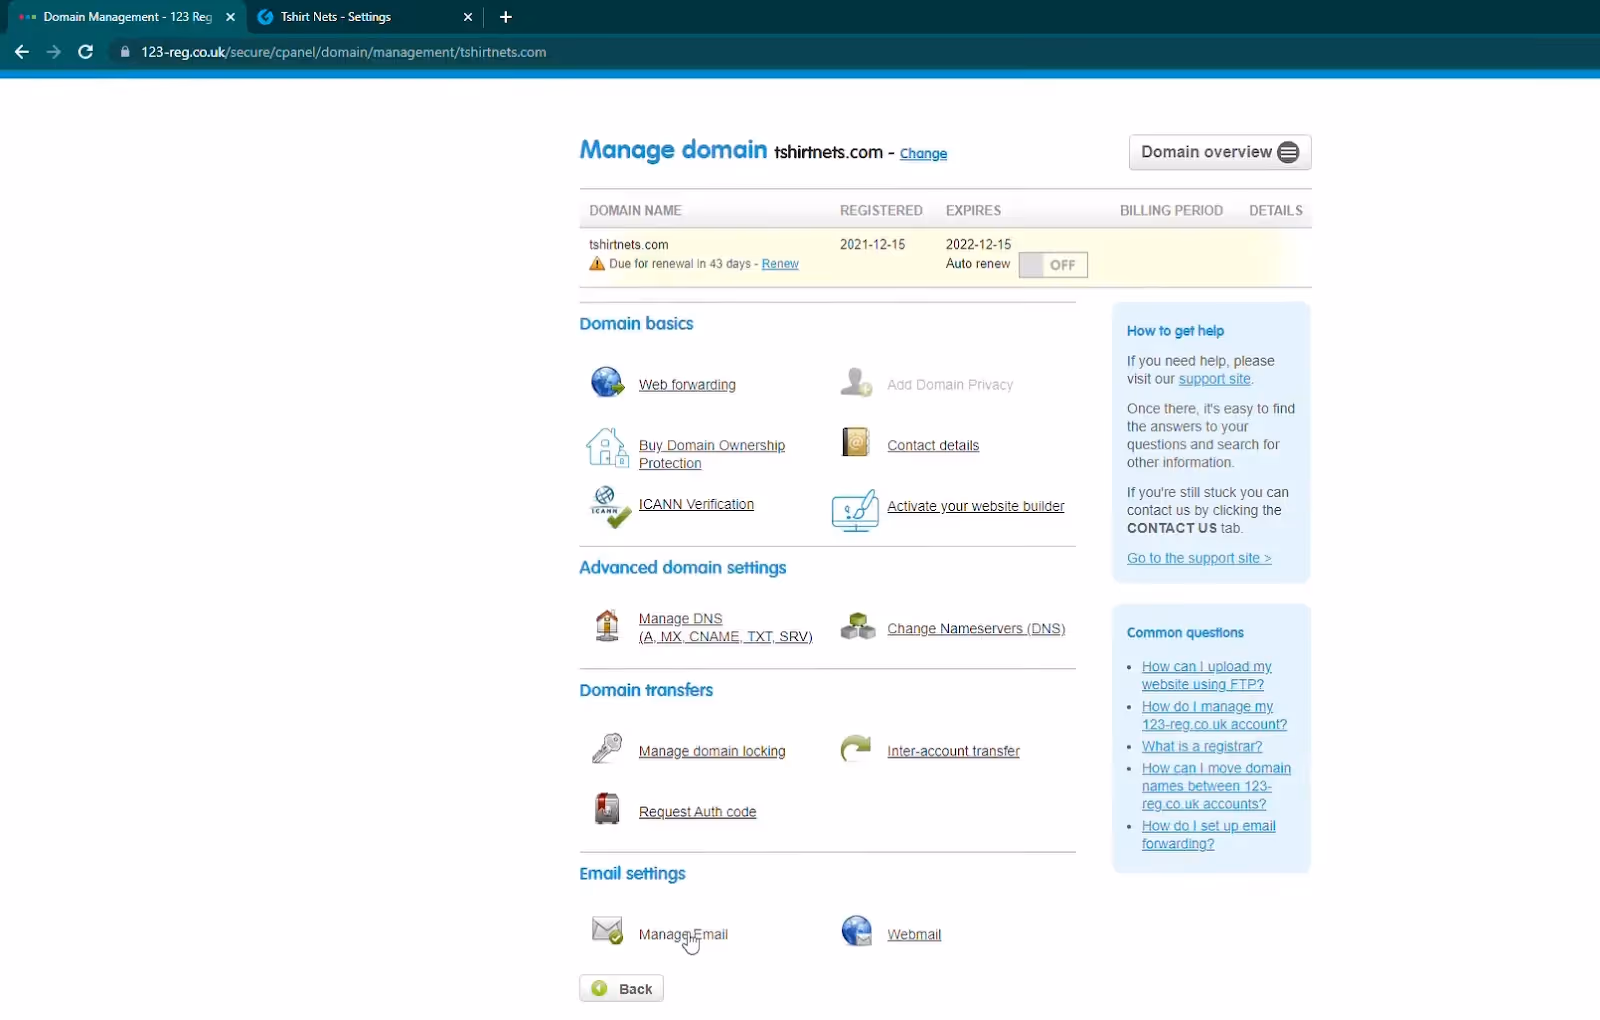
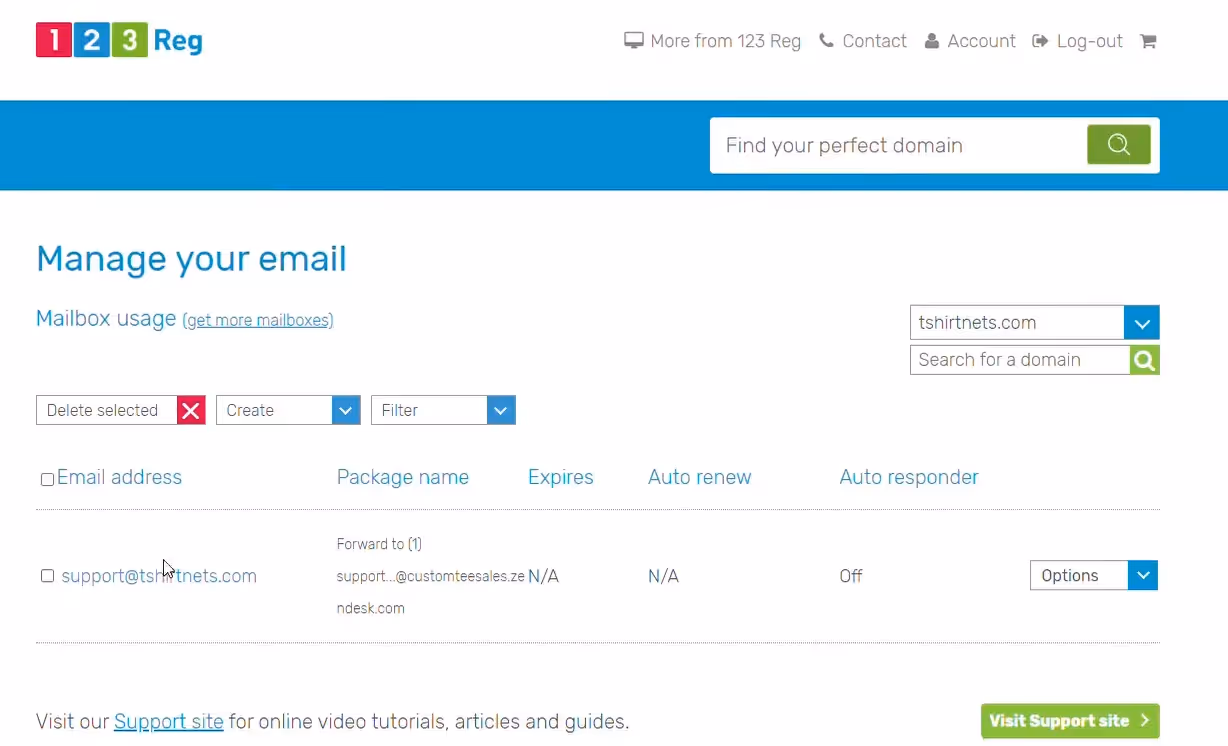
এই বিভাগে আপনি ডিএনএস রেকর্ড এবং ইমেল ফরওয়ার্ডিংয়ের জন্য আপনার ডোমেনের কনফিগারেশন দেখতে পাবেন।
For the DNS records you should click in the Manage DNS option and proceed to add the indicated records in the Gearlaunch website.
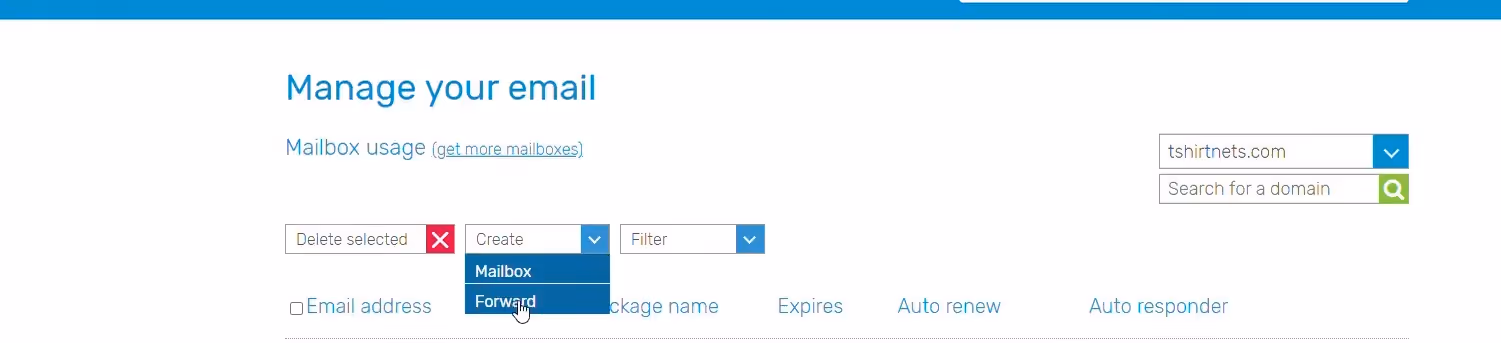
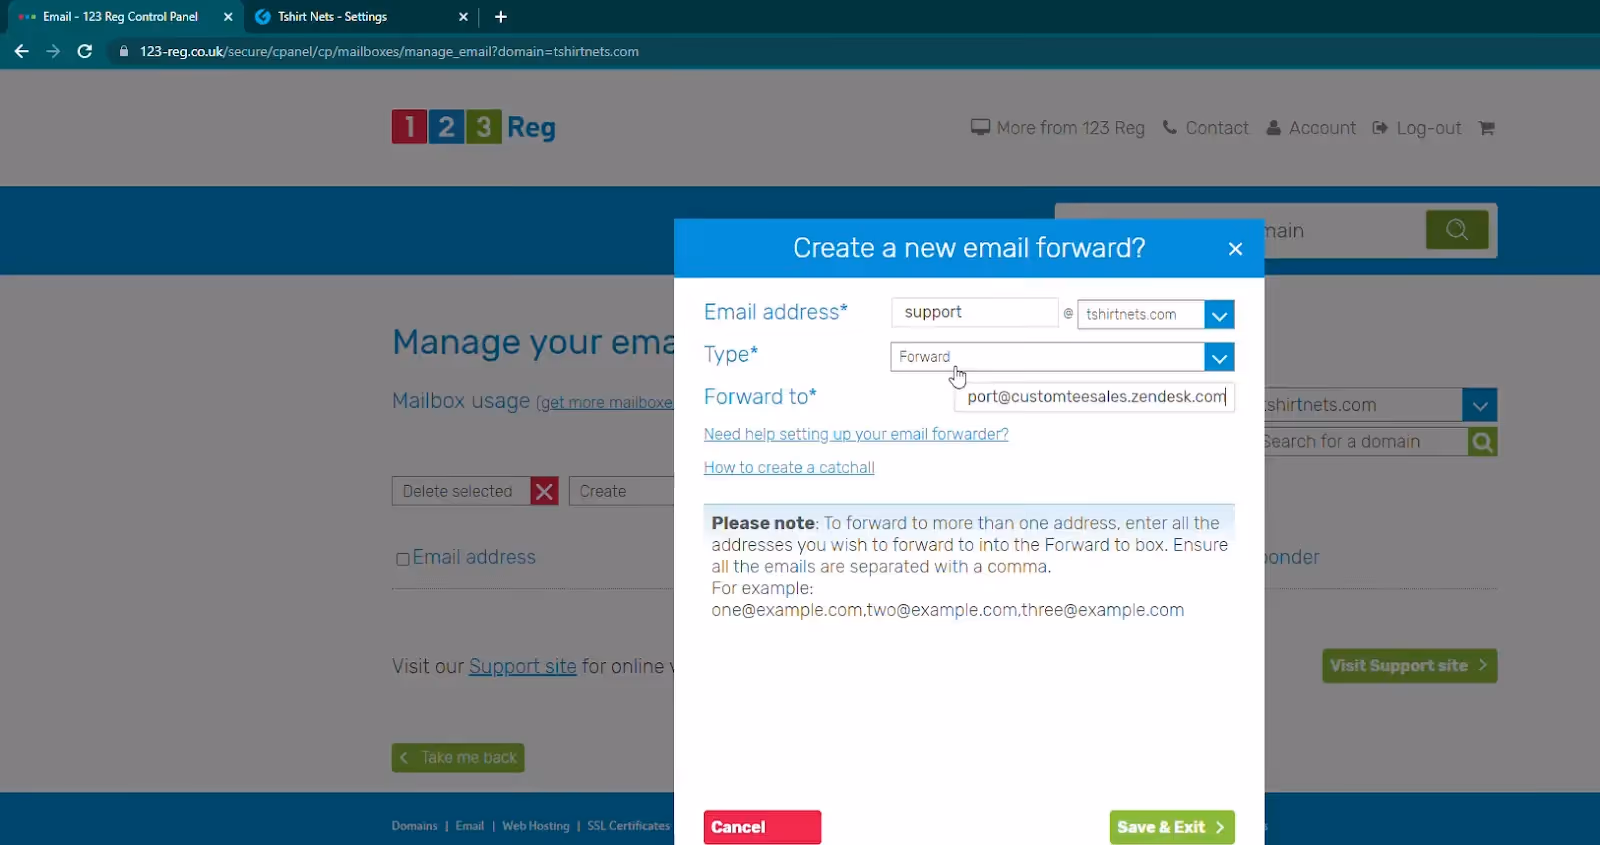
For the Email forwarding, you should scroll until you see the Manage Email option, click in Manage Email option, in the next window you need to click on “Create” option and select the option “Forward” to set up Email Forwarding from: support@yourdomain.com to support@customteesales.zendesk.com
Once you have updated your DNS records on your domain registrar, go back to your GearLaunch dashboard and click the “Verify DNS records” button.

Once the email forwarding is set up and confirmed, your store will begin the SSL certificate signing process, which could take up to 24 hours to be completed. It’s worth the wait for your store to be live and secure.
ভিডিও নির্দেশনা:


.svg)
.svg)
.svg)


